
For this blog, I decided to move away from ‘me’ and onto something ‘work’ related.
Hopefully you’ll find this useful and if it helps just one of you with a lightbulb moment, then I’ll be chuffed.
So, Headers & Footers.
What are they? Well, they’re just what they say on the tin.
In Word, and Excel and PowerPoint too, you can put something at the top and/or bottom of the page (header & footer) in your documents that will appear on each page.
To add either, go to the ‘Insert’ tab and click on Header or Footer depending on what you want to do. A new tab will appear at the top called… wait for it… ‘Header & Footer’!
That is all straight forward and I’m sure I’m not telling you anything you don’t know.
BUT… did you know that if you double click at the top or bottom of the page, that’s a much faster way to open up the header or footer? Go on, try it.
When you’re in the header or footer, a new tab will appear which will give you a number of options to format your headers & footers which will look something like this.

In the header, you might have your logo, your address or contact details.
In the footer, you might have the date, page number, your logo, a version number, i.e. v1, v2 if you roll forward versions, or even file path name if you have it saved in the depths of your electronic storage system.
Adding a page number and a date
To add a page number, click
- the ‘down arrow’ of Page Number. Some options will appear of where you can have the page number to appear on your page.
- Make your choice – there are oodles of options. You can have just a number, you can have ‘Page x of y’, ‘Page 1’ – well, tbh, the list is endless.
To add a date, click
- ‘Date & Time’. Choose your preference.
- Check the box at the bottom ‘update automatically’ if you’d like the date updated each time you open up the document. Be clear and sure you want the date to be updated automatically on opening. It may be that the date is crucial on a particular document, so you won’t want it updated if you’re just checking something.
Both the date and page numbers can be highlighted (Ctrl + A) and changed to your corporate font, colour, and size.
So, you have the basics all set up in your header & footer.
Now, the challenge starts when your document is more than one page.
If you want different things in your header & footer on your second page, you’ll need to add a ‘Section Break’ at the bottom of page 1 in the body of the page (not in the header or footer area).
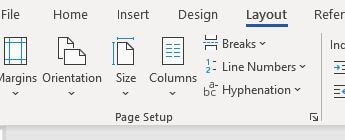
To add, in Layout, click
- ‘Breaks’ – choose ‘Next Page’
When this is added, go back into your Header or Footer, and remove ‘Link to Previous’.

You can then alter anything in the header & footer, and it won’t change on page 1.
The ‘Next Page’ Section Break keeps all the formatting on that page to that page only, so when you move to the next page, you can amend any formatting without disturbing the previous page.
True fact for this week is: When I format and tidy up a Word Document, I add a ‘Next Page‘ Section Break to every page. After the initial font, size, margin etc amendments, it gives me peace of mind to know I can move through the document, updating and format each page, knowing it isn’t interfering with previous pages that have been ‘tidied up’.
Changing a page from Portrait to Landscape without the whole document changing
If you require a page to change from portrait to landscape, just add a ‘Next Page’ Section Break on both the portrait page and the page changing to landscape. In addition, remove the ‘Link to Previous’ in the header and footer on the page that you’re changing to landscape as well as the page following this. When that is done, in the ‘Layout’ tab on the ribbon, click ‘Orientation’ and change from portrait to landscape.
The same process applies if you have a document in landscape and one page needs to change to portrait.
This is just the basics to get you going with headers & footers in Microsoft Word. The same process applies to Excel. The options in PowerPoint are reduced in the headers & footers area, but for anything more than adding a date or slide number, you would use Slide Master.
Hopefully this will help a little, but if you get in a pickle, email me, and I can rectify any issues and get you back on track to a professional-looking document.

Pingback: I for Inbox Management | The Wright VA